Table of Contents
There’s something magical about the sound of a tube amp pushed to its sweet spot—that glorious crunch where notes bloom with harmonic richness and every chord rings with authority. In the studio, where every detail matters and volume control is paramount, low-wattage tube amplifiers have become the secret weapon of producers and session players alike. These pint-sized powerhouses deliver that coveted breakup at manageable levels, letting you crank them wide open without demolishing your walls or drowning out the drum overheads.
As we look toward 2026, the landscape of low-watt tube amps has evolved far beyond simple bedroom practice boxes. Modern designs blend vintage inspiration with cutting-edge features like reactive load attenuation, impulse response technology, and studio-grade direct outputs. Whether you’re tracking rhythm guitars, layering overdubs, or crafting the perfect lead tone, understanding what makes these amps tick will transform your recording workflow and elevate your sonic palette.
Top 10 Low Watt Tube Guitar Amplifiers
Detailed Product Reviews
1. Monoprice 5-Watt, 1x8 Guitar Combo Tube Amplifier with Celestion Speaker - Stage Right Series

Overview: The Monoprice Stage Right 5-watt combo delivers authentic tube tone in a compact, budget-friendly package. Featuring a genuine 6V6GT power tube and ECC83 preamp, this amplifier pairs vintage circuitry with a Celestion Super 8 GBA-15 speaker, offering beginners and bedroom players access to true tube dynamics without the boutique price tag.
What Makes It Stand Out: This amp distinguishes itself by including a name-brand Celestion speaker at an entry-level price point—a rarity in this segment. The dual-input design (Low and High) provides practical versatility, allowing players to choose between cleaner tones or easier overdrive saturation. Its straightforward, no-frills approach focuses resources on core tone rather than superfluous features.
Value for Money: Priced competitively against solid-state practice amps, this offers genuine tube circuitry for roughly the cost of a quality effects pedal. Comparable 5-watt tube combos from established brands often cost 50-100% more, making this an exceptional entry point. The Celestion speaker alone represents significant value, as upgrading stock speakers typically costs $50-80.
Strengths and Weaknesses: Pros: Authentic tube warmth and dynamic response; quality Celestion speaker; simple operation ideal for learning; compact footprint; low input option preserves clean headroom. Cons: Limited tone-shaping controls (no EQ mentioned); 8-inch speaker lacks low-end depth; basic cabinet construction; no effects loop or external speaker output; 5 watts may be insufficient for gigging.
Bottom Line: An outstanding choice for players seeking their first tube amp or a home recording tool. While feature-sparse, its core tone and component quality far exceed expectations at this price. Perfect for practice, recording, and discovering genuine tube dynamics without financial commitment.
2. OriPure 5W All Tube Guitar Amplifier Head OA-H05

Overview: The OriPure OA-H05 is a handcrafted 5-watt tube head designed for discerning players who prioritize tonal purity and build quality. This single-ended Class A amplifier employs an EL84 power tube, 12AX7 preamp, and 6Z4 rectifier, delivering classic British-flavored breakup. Its aluminum chassis and meticulously wound output transformer signal boutique aspirations at a moderate price point.
What Makes It Stand Out: The handcrafted output transformer with paper insulation process represents serious attention to detail, reducing stray capacitance for enhanced high-frequency clarity and superior transient response. The BRIGHT/WARM toggle and full three-band EQ provide exceptional tonal flexibility rarely found in 5-watt designs. The cast-aluminum casing combines durability with professional aesthetics.
Value for Money: Positioned between mass-market and high-end boutique heads, this offers genuine handcrafted quality without the $500+ price tag typical of custom builders. The transformer alone justifies the cost, rivaling upgrades that often exceed $100. Compared to other 5-watt heads, the comprehensive EQ and switching options deliver versatility that eliminates the need for multiple amps.
Strengths and Weaknesses: Pros: Exceptional build quality; versatile tone controls; premium transformer design; durable aluminum housing; both 8Ω and 16Ω outputs. Cons: Requires external speaker cabinet; 5-watt limitation restricts clean headroom; EL84 character may not suit those preferring 6V6 American tones; no effects loop.
Bottom Line: Ideal for studio work and home use where tone quality trumps raw power. The OA-H05 punches above its weight class, offering boutique-level craftsmanship and flexibility. Players seeking a premium low-wattage head with real character will find exceptional value here.
3. JJ Electronics T-6L6GC-JJ-MQ Amplifier Tube

Overview: The JJ 6L6GC-MQ is a Slovakian-made power tube delivering 30 watts of robust output for guitar amplifiers and audio equipment. Renowned for its balanced frequency response, this octal-based beam tetrode features colorful low-end, relaxed midrange body, and articulate high-frequency chime. Available in matched configurations, it ensures consistent performance in push-pull amplifier designs.
What Makes It Stand Out: JJ’s proprietary Apex matching process guarantees precise plate current and transconductance pairing, critical for balanced push-pull operation and minimizing hum. The tube’s signature “loose” midrange character provides a forgiving, musical quality that flatters single-coil pickups, while its tight overdrive bite maintains clarity under heavy distortion—an uncommon combination.
Value for Money: Priced competitively against premium American and Russian brands, JJ tubes offer remarkable consistency and longevity. Single tubes cost marginally more than budget Chinese options but deliver superior tone and reliability. Matched pairs and quads save the expense and guesswork of manual matching, representing excellent value for amp upgrades or maintenance.
Strengths and Weaknesses: Pros: Excellent tonal balance; tight low-end control; bright, clear highs; consistent manufacturing; cost-effective matched sets; durable construction. Cons: Loose midrange may lack focus for some styles; not as aggressive as some modern high-gain tubes; requires proper bias adjustment; Apex matching adds cost premium over singles.
Bottom Line: A top-tier choice for players seeking reliable, musical 6L6GC tubes. Whether upgrading a Fender-style amp or maintaining a high-gain head, the JJ delivers professional performance. The matched sets are particularly valuable for ensuring optimal amplifier performance and tonal consistency.
4. JJ Electronics T-6L6GC-JJ Amplifier Tube
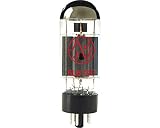
Overview: The JJ Electronics 6L6GC is a Slovakian-made octal power tube rated at 30 watts maximum plate dissipation. This beam tetrode delivers a characteristic tone signature with rich low-end harmonic content, a relaxed midrange presence, and sparkling high-frequency detail. The same core design as the matched-quad variant, it’s available as singles, pairs, or quads to suit various amplifier configurations.
What Makes It Stand Out: Manufactured in JJ’s precision facility, this tube maintains exceptional consistency batch-to-batch, eliminating the reliability concerns of lesser brands. Its ability to produce both pristine clean tones and tight, focused overdrive makes it remarkably versatile. The single-tube purchase option allows players to replace individual failed tubes economically without committing to a full matched set.
Value for Money: Offering near-boutique performance at mid-tier pricing, the JJ 6L6GC represents intelligent value. Singles cost only slightly more than generic alternatives while providing audibly superior tone and longer lifespan. For budget-conscious maintainers, buying individual tubes as needed spreads cost over time, though matched sets remain recommended for optimal performance.
Strengths and Weaknesses: Pros: Consistent quality control; musical, balanced voicing; excellent clean and overdriven performance; cost-effective single-tube option; reliable longevity. Cons: Midrange may feel too “loose” for tight modern metal; requires careful bias adjustment; individual tubes may not match existing set; lacks the guaranteed pairing of Apex-matched variants.
Bottom Line: A dependable, great-sounding 6L6GC for everyday amp maintenance and tone upgrades. While matched sets ensure best performance, the single-tube availability provides flexibility for players on a budget. Ideal for Fender, Mesa, and other 6L6-based amplifiers seeking reliable, musical tone.
5. JOYO Atomic BanTamp Series Mini Amp Head 20W Hybrid Tube 2-Channel Guitar Amplifier with Bluetooth (No Sound, Need Extra Speaker)

Overview: The JOYO Atomic BanTamp packs 20 watts of hybrid power and modern connectivity into a pedalboard-friendly footprint. Combining a 12AX7 preamp tube with a solid-state power section, it delivers British-inspired clean and drive tones with practical features for contemporary players. Bluetooth streaming and a headphone output make it a versatile practice and recording solution.
What Makes It Stand Out: The Atomic distinguishes itself through feature density: wireless Bluetooth input for backing tracks, a studio-quality FX loop for pristine effects integration, and convincing speaker-emulated headphone output for silent practice. Its two-channel design with independent gain structures provides genuine versatility, while the hybrid approach ensures reliability and consistent performance at low volumes.
Value for Money: This mini head competes directly with units twice its price, offering capabilities—Bluetooth, FX loop, cab simulation—that many lack. Compared to traditional tube heads requiring attenuators for home use, the Atomic’s design and headphone output save additional expense. It’s essentially three devices: practice amp, recording interface, and performance head.
Strengths and Weaknesses: Pros: Compact, portable design; Bluetooth connectivity; excellent pedal platform; FX loop preserves effects clarity; headphone out with cab simulation; loud 20W output. Cons: Requires external speaker for sound; hybrid design lacks all-tube warmth; solid-state power section may feel less dynamic; Bluetooth latency potential; no footswitch included.
Bottom Line: Perfect for apartment dwellers, recording musicians, and gigging players needing portability. The Atomic’s modern feature set solves real practice and performance challenges. While purists may miss all-tube power amp response, the convenience and versatility make it an indispensable tool for today’s guitarist.
6. Bugera V5 INFINIUM 5-Watt Class-A Tube Amplifier Combo with INFINIUM Tube Life Multiplier, Original Turbosound Speaker, Reverb and Power Attenuator

Overview: The Bugera V5 INFINIUM delivers authentic Class-A tube tone in a compact, bedroom-friendly combo. This hand-built 5-watt amplifier pairs a 12AX7 preamp tube with an EL84 power tube through an 8-inch Turbosound speaker, offering everything from warm cleans to crunchy overdrive. The built-in attenuator lets you dial down to 0.1 watts for late-night practice, while the vintage aesthetic and reverb complete the classic vibe.
What Makes It Stand Out: Bugera’s INFINIUM Tube Life Multiplier technology automatically monitors and adjusts tube performance, extending lifespan by up to 20 times while alerting you when replacement is needed. The inclusion of a genuine Turbosound speaker—normally found in high-end PA systems—provides exceptional clarity and projection rarely seen in this price class. This combination of modern reliability tech and premium components sets it apart from typical entry-level tube amps.
Value for Money: Priced competitively against entry-level tube amps, the V5 INFINIUM offers features typically reserved for premium models. The tube monitoring system alone saves hundreds in replacement costs, while the attenuator eliminates the need for separate load boxes. Compared to the Monoprice 5-watt or Fender Champ, you’re getting superior speaker quality and modern reliability at a similar price point, making it a smart long-term investment.
Strengths and Weaknesses: Strengths: INFINIUM tube protection; effective power attenuator; premium Turbosound speaker; genuine tube overdrive; vintage aesthetics; built-in reverb. Weaknesses: 8-inch speaker limits low-end response; Bugera’s historical reliability concerns (though improved); single-channel design requires guitar volume manipulation; no effects loop.
Bottom Line: The V5 INFINIUM is an exceptional value for bedroom players and recording musicians seeking authentic tube tone without maintenance headaches. While it won’t replace your gigging amp, its attenuator and tube longevity tech make it one of the smartest low-wattage tube purchases available.
7. Inside Tube Amps: The Design, Modification and Repair Manual for Vacuum Tube Guitar Amplifiers

Overview: This technical manual serves as a comprehensive guide for understanding, building, and maintaining vacuum tube guitar amplifiers. Targeted at serious enthusiasts, technicians, and DIY builders, it demystifies tube circuitry from foundational principles to advanced modifications. The book bridges the gap between theoretical electronics and practical amp servicing, making it essential for anyone wanting to truly understand their tube amp’s inner workings.
What Makes It Stand Out: Unlike generic electronics texts, this manual focuses exclusively on guitar amplifier applications, providing circuit-specific analysis and real-world troubleshooting scenarios. Its modification section offers practical recipes for voicing changes, tone stack tweaks, and performance upgrades that online forums only hint at. The repair methodologies can save owners thousands in technician fees over a lifetime of amp ownership.
Value for Money: For the price of a single professional amp repair, this manual equips you with knowledge applicable to countless projects. While free online resources exist, their fragmented nature and variable accuracy make this organized, comprehensive reference invaluable. It competes directly with Aspen Pittman’s “The Tube Amp Book” but offers more practical repair focus than historical perspective, making it more actionable for active builders.
Strengths and Weaknesses: Strengths: Comprehensive technical depth; practical modification guides; troubleshooting focus; cost-saving repair instructions; amplifier-specific content. Weaknesses: No listed features require speculation; steep learning curve for beginners; may assume prior electronics knowledge; potentially outdated given tube amp evolution; technical diagrams may be dense for novices.
Bottom Line: This manual is essential for anyone serious about tube amp maintenance and modification, but casual players should steer clear. If you’re comfortable with a multimeter and soldering iron, the investment pays for itself with your first successful repair. Beginners should start with online tutorials before committing.
8. OriPure 15W All Tube Guitar Amplifier Head Paper Insulation Handcrafted Output Transformer OA-H15

Overview: The OriPure OA-H15 is a hand-built 15-watt all-tube amplifier head designed for tone purists who value component quality over brand recognition. Featuring a paper-insulated output transformer and switchable 1-watt mode, this single-ended Class-A design delivers transparent cleans to harmonic-rich overdrive through two EL84 power tubes and a 12AX7 preamp. Its cast-aluminum chassis exudes boutique quality.
What Makes It Stand Out: The handcrafted paper-insulation output transformer is the star, utilizing Grain-Oriented Silicon Steel to enhance frequency response and reduce stray capacitance—a feature typically found in boutique amps costing three times as much. The 1W/15W switch provides genuine power scaling rather than simple attenuation, preserving tone at whisper volumes. This attention to transformer detail demonstrates audiophile-grade engineering.
Value for Money: This head punches well above its weight class, competing with the Orange Tiny Terror and Marshall DSL1HR but offering superior transformer quality and true Class-A architecture. The paper-wound transformer alone justifies the price for tone connoisseurs. You’re essentially getting boutique craftsmanship without the boutique markup, though you’ll need to budget for a quality cabinet to realize its full potential.
Strengths and Weaknesses: Strengths: Premium paper-insulation transformer; effective power scaling; hand-built quality; excellent high-frequency clarity; robust aluminum housing; versatile gain range. Weaknesses: Obscure brand with limited reviews; requires external speaker cabinet; 15 watts may be underpowered for clean headroom in band settings; no effects loop; single channel operation.
Bottom Line: The OA-H15 is a hidden gem for recording artists and home tone enthusiasts who prioritize signal path purity. If you already own a quality 1x12 or 2x12 cabinet, this head delivers boutique performance at mass-market pricing. Gigging musicians should verify reliability through extended testing first.
9. Flatsons FBA-10 Guitar Amp, 10W Mini Electric Guitar Amplifier with Clean/Drive Channel, 6H Working, USB-C Rechargeable, 3.5mm Headphone/AUX Jack, Wireless Portable Amp for Indoor Practice, Traveling

Overview: The Flatsons FBA-10 redefines portable practice amps with its battery-powered, Bluetooth-enabled design that doesn’t sacrifice tone. This 10-watt mini amplifier features pure analog circuitry, dual channels, and USB-C charging, delivering up to six hours of wireless playing time. Its compact footprint makes it ideal for travel, dorm rooms, and silent practice sessions where traditional amps are impractical.
What Makes It Stand Out: True analog signal processing in a battery-powered format is rare, preserving natural harmonic content unlike many digital modeling amps. The Bluetooth 5.3 connectivity allows seamless backing track streaming, while the separate CLEAN/DRIVE channels with independent gain and tone controls provide genuine tonal versatility. The vintage-inspired two-tone grille adds aesthetic appeal that belies its modern functionality.
Value for Money: Competing with the Blackstar Fly and Vox Mini Go, the FBA-10 offers superior battery life and wireless audio capability at a similar price point. The USB-C charging and analog architecture provide modern convenience without digital sterility. For travelers and apartment dwellers, it eliminates the need for separate headphone amps and Bluetooth speakers, consolidating multiple functions into one device.
Strengths and Weaknesses: Strengths: Six-hour battery life; Bluetooth 5.3 connectivity; true analog tone; USB-C charging; headphone/aux jacks; portable lightweight design; dual channels. Weaknesses: 10 watts limits gigging utility; likely plastic construction; “analog” marketing may mislead those expecting tube tone; single 3.5mm speaker limits projection; no effects loop.
Bottom Line: The FBA-10 is the ultimate travel companion for guitarists prioritizing portability and authentic tone over raw power. Perfect for hotel rooms, camping trips, and silent practice, it renders separate headphone amps obsolete. Don’t expect stage volume, but for its intended purpose, it’s exceptionally well-executed and reasonably priced.
10. JOYO Meteor II BanTamp XL Series Mini Amp Head 20 Watt Preamp 2 Channel Hybrid Tube Guitar Amplifier Head for Electric Guitar with Bluetooth

Overview: The JOYO Meteor II BanTamp XL packs modern high-gain versatility into a lunchbox-sized hybrid head. Combining a 12AX7 preamp tube with a 20-watt solid-state power section, this two-channel amp delivers British-flavored distortion and pristine cleans with independent channel controls. Bluetooth connectivity and an FX loop add contemporary flexibility to its compact form factor, making it a practical solution for space-conscious players.
What Makes It Stand Out: Independent channel controls with footswitchable operation are rare in this size and price class, allowing seamless live switching without volume balancing issues. The hybrid design wisely uses the tube where it matters most—in the preamp—while the solid-state power amp keeps weight down and reliability up. Bluetooth audio streaming for practice and an FX loop for effects integration show JOYO understands modern player needs.
Value for Money: The Meteor II competes with the Hotone Mojo Diamond and Orange Micro Dark but offers more comprehensive channel control and Bluetooth functionality. Its hybrid approach delivers 80% of full-tube tone at 50% of the cost and weight. For home recording and small gigs, it eliminates the need for separate clean and dirty channels or external channel switchers, consolidating your rig.
Strengths and Weaknesses: Strengths: True two-channel footswitching; independent channel controls; Bluetooth connectivity; FX loop; compact portability; hybrid reliability; excellent pedal platform clean channel. Weaknesses: Solid-state power amp lacks tube compression; 20 watts may be marginal for loud drummers; JOYO brand still building reputation; no onboard reverb; single preamp tube limits headroom.
Bottom Line: The Meteor II is a pragmatic choice for players wanting channel-switching versatility without breaking the bank or their back. Ideal for pedalboard-centric guitarists and home studio owners, it excels as a compact second amp. Purists seeking all-tube sag should look elsewhere, but for modern flexibility, it’s a winner.
Understanding the Studio Crunch Phenomenon
Studio crunch isn’t just distortion—it’s a complex harmonic cascade that occurs when tubes reach their operational limits in a controlled environment. Unlike high-gain preamp distortion, which can sound compressed and sterile, true power amp saturation creates a dynamic, three-dimensional character that responds to your picking attack and guitar volume knob with living, breathing authenticity. In the studio, this translates to tracks that sit perfectly in a mix without requiring layers of post-processing to sound “real.”
The magic happens when power tubes begin to clip symmetrically, generating even-order harmonics that our ears perceive as warm and musical. This phenomenon is nearly impossible to replicate with software alone, which is why top-tier producers still insist on miking real cabinets even in an era of hyper-realistic amp modeling. Low-wattage designs simply let you achieve this saturated glory at 90-95dB instead of 120dB, making them practical for modern recording environments where bleed and room capture must be carefully managed.
Why Low-Wattage Rules the Modern Studio
The shift toward low-wattage amps in professional studios isn’t just a trend—it’s a fundamental response to how music is made today. With more productions happening in smaller, treated rooms and residential studios, the ability to achieve full-throttle tones without triggering noise complaints or overwhelming sensitive condenser microphones has become essential. A well-designed 5-15 watt tube amp can deliver 90% of the sonic character of its 100-watt big brother while allowing you to maintain conversation levels in the control room.
Additionally, modern recording techniques often involve layering multiple guitar parts. When you’re stacking four or six rhythm tracks, each recorded with a cranked 100-watt half-stack, you quickly create an unmanageable wall of noise that fights against vocal clarity and drum definition. Low-wattage amps provide the perfect solution: each layer retains its distinct character and harmonic content without building an uncontrollable mountain of low-end rumble and harsh high-end.
Decoding Wattage: It’s Not Just About Volume
Wattage ratings on tube amps are perhaps the most misunderstood specifications in all of guitar gear. A 5-watt amp isn’t simply 20 times quieter than a 100-watt amp—in reality, it’s only about 13dB softer. That’s still loud enough to require ear protection in a small room, but crucially, it reaches its sweet spot at dramatically lower volume levels. The relationship between wattage and perceived volume is logarithmic, meaning each doubling of wattage only increases volume by roughly 3dB.
For studio crunch purposes, the wattage rating tells you more about headroom and breakup characteristics than raw volume. A 1-watt amp might start saturating at bedroom levels, while a 15-watt design gives you enough clean headroom for dynamic cleans before pushing into that glorious crunch territory. Understanding this relationship helps you choose an amp that breaks up at your ideal recording level, whether you’re in a iso booth or a small live room.
Power Tube Types and Their Sonic Signature
The specific tubes handling your output stage dramatically shape your crunch character. EL84s, famous for their chime and midrange-forward voice, break up earlier and produce a glassy, British-style crunch that cuts through dense mixes with precision. They’re the go-to choice for jangly rhythm work and articulate lead tones where note definition is paramount.
EL34s, the Marshall staple, deliver a thicker, more aggressive crunch with enhanced low-mid punch and a slightly slower, more forgiving response. They excel at rock rhythm tones where you want that authoritative “thunk” on palm-muted passages. 6V6 tubes, the American counterpart, offer a rounder, warmer breakup with sweeter highs and a more compressed feel—perfect for bluesy leads and vintage-style crunch that doesn’t overpower.
The often-overlooked 6L6 family provides the cleanest headroom and most robust low-end, making them ideal for players who want tight, controlled crunch even at lower wattages. Meanwhile, the resurgence of obscure tubes like the 6973 and 6AQ5 in boutique designs offers unique flavors that can set your recordings apart from the sea of EL84-based tones.
Preamp vs. Power Amp Distortion: The Crunch Equation
Achieving the perfect studio crunch requires understanding the balance between preamp gain and power amp saturation. Preamp distortion, generated in the early gain stages, provides the sizzle, compression, and sustain that define modern rock tones. It’s tight, focused, and consistent—but on its own, can sound two-dimensional and lifeless.
Power amp distortion adds the dimension, the “swirl,” and the harmonic complexity that makes notes feel three-dimensional. It introduces subtle intermodulation distortion and dynamic compression that responds to your playing in real-time. The best low-watt studio amps allow you to blend these two distortion types seamlessly, often through independent gain and master volume controls that let you dial in the perfect ratio of preamp sizzle to power amp bloom.
For recording, this blend is crucial. Too much preamp distortion and your tracks will sound small and fizzy in the mix. Too much power amp saturation without enough preamp structure, and you’ll lose note definition under gain. The sweet spot varies by genre, but generally, a 60/40 split favoring power amp saturation yields the most mix-friendly crunch tones.
Speaker Configuration: Size, Number, and Character
Your speaker choice is as critical as the amp itself when crafting studio crunch. A 1×12″ combo might seem limiting, but it offers focused midrange and easier miking than a 2×12″ or 4×12″ cabinet. The single speaker’s directivity pattern creates a more consistent tone across the cone, making mic placement less finicky during multiple sessions.
Ten-inch speakers, often dismissed as “practice amp” components, can deliver surprisingly robust crunch with enhanced upper-mid articulation that sits beautifully in dense mixes. They break up earlier than 12″ speakers, adding their own compression and harmonic content to the equation. Eight-inch speakers, while limited in low-end response, provide a unique, boxy character that can be perfect for lo-fi textures or cutting lead tones that occupy a narrow frequency band.
The cabinet design itself matters immensely. Open-back cabinets project a wider, more ambient sound that captures room reflections naturally, while closed-back designs focus the low-end and create a tighter, more direct crunch that engineers love for its predictability. Many modern studio amps offer convertible back panels, giving you both options in a single package.
The Attenuator Advantage: Taming the Beast
Built-in attenuation has revolutionized what low-wattage amps can achieve in the studio. A reactive load attenuator doesn’t just turn down volume—it maintains the complex impedance relationship between the power tubes and speaker, preserving the feel and frequency response of a cranked amp at whisper levels. This technology uses sophisticated circuitry to mimic the speaker’s reactive properties, ensuring your power tubes see the same load they’d encounter at full volume.
The key advantage for studio work is the ability to fine-tune your recording level independently from your tone. You can dial in the perfect amount of power tube saturation, then attenuate down to the exact SPL that works for your room and microphone choice. Some designs even offer incremental attenuation steps rather than continuous controls, giving you repeatable settings for different recording scenarios.
Look for amps with switchable attenuation levels or master volume bypass options. This flexibility lets you run the amp full-out into the attenuator for maximum saturation, or bypass it entirely when you need more headroom and dynamics for cleaner passages.
Master Volume Circuits: Clean to Crunch at Any Level
Not all master volumes are created equal. The earliest post-phase-inverter master volume (PPIMV) designs bled off signal after the power amp’s input stage, preserving more of the preamp character while offering limited control over power tube saturation. Modern designs place the master volume earlier in the circuit or use dual-concentric controls to manage both preamp and power amp levels independently.
The best studio amps feature master volume circuits that remain transparent even at low settings. Cheaper implementations can introduce harshness, fizz, or volume taper issues that make fine adjustments impossible. A quality master volume should give you smooth, predictable control from bedroom levels to stage volume without altering the core tone character.
Some innovative designs incorporate a “gain reduction” circuit that automatically adjusts the preamp gain as you lower the master volume, maintaining the same distortion character across different volume levels. This is particularly valuable in session work where you might need to quickly adapt to different recording environments without rebuilding your tone from scratch.
EQ Voicing and Tone Stack Depth
The tone stack—your bass, middle, and treble controls—is the unsung hero of amp flexibility. Traditional FMV (Fender-Marshall-Vox) tone stacks offer different voicing curves that dramatically affect how your crunch translates to tape. Fender-style stacks provide scooped mids and extended highs, creating open, airy crunch that leaves space for vocals. Marshall-style mid-heavy voicing delivers the aggressive, in-your-face crunch that defines rock guitar. Vox-style top-boost circuits offer chime and articulation that cuts through without harshness.
Modern studio amps often feature modified or switchable tone stacks that let you access multiple voicings. Some include “deep” switches that extend low-end response or “bright” caps that can be defeated for darker, more controlled crunch. The key for recording is having enough range to adapt the amp to different guitars and mic choices without requiring extensive EQ in your DAW.
Look for amps with interactive EQ controls where adjusting one band affects the others, mimicking classic designs. This interactivity creates more musical, organic tone-shaping than independent bands. Some premium designs even offer mid-frequency shift controls, letting you target the exact frequency range that defines your crunch character.
Effects Loop Quality and Preamp Pedal Friendliness
A series effects loop can make or break your studio workflow, especially if you rely on time-based effects or preamp pedals. The loop’s send and return levels must match your pedals’ optimal operating range—too hot, and you’ll clip digital delays; too cold, and you’ll introduce noise floor issues. Professional-grade loops include level controls and sometimes even impedance switching to accommodate everything from vintage tape echoes to modern DSP units.
Buffered loops prevent tone suck from long cable runs between your amp and pedalboard, while true bypass loops maintain absolute signal purity when disengaged. For studio work, a buffered loop with a defeat switch offers the best of both worlds. The loop’s placement in the circuit matters too—post-phase-inverter loops capture power amp coloration in your delays, while pre-phase-inverter loops keep effects cleaner and more defined.
With the rise of high-quality preamp pedals like the Benson Preamp or Chase Bliss Preamp MKII, many players are using low-watt amps as pure power sections. In this scenario, the effects loop becomes your main input, so its transparency and headroom are paramount. Look for loops with at least +10dB of headroom above your pedal’s output to ensure clean, dynamic response.
Build Quality: From PCB to Hand-Wiring
Construction methodology directly impacts both tone and long-term reliability. Mass-produced printed circuit board (PCB) amps offer consistency and affordability but can be difficult to repair and may use lower-quality components in non-critical paths. Hand-wired turret board or eyelet board construction allows for easier modifications, superior component selection, and often better signal path layout that minimizes noise and crosstalk.
For studio use, reliability is non-negotiable. A session-halting failure can cost thousands in lost time. Hand-wired amps typically use higher-voltage-rated components with better tolerances, translating to longer life under constant use. The solder joints are often more robust, and the physical layout allows for better heat dissipation—a critical factor when you’re running amps cranked for hours during tracking.
That said, modern PCB designs have improved dramatically. Some manufacturers use thick, double-sided boards with generous trace widths and high-temperature solder. The key is examining the component quality: Are the capacitors audio-grade? Are the resistors metal film for lower noise? Are the tube sockets chassis-mounted rather than board-mounted? These details separate gig-worthy studio amps from bedroom toys.
Recording-Ready Features: DI, IRs, and Silent Recording
The modern studio amp extends far beyond a simple speaker output. Built-in DI capabilities with speaker emulation have become essential for silent recording or blending with mic’d signals. The best implementations use actual analog filtering derived from real speaker measurements rather than generic EQ curves, capturing the complex impedance interactions that define a speaker’s frequency response.
Some cutting-edge designs incorporate impulse response technology, allowing you to load custom IRs directly into the amp’s output stage. This lets you record “silently” while still capturing the exact mic and cabinet character you want, complete with reactive load feel. For session guitarists, this means showing up to any studio with your entire cabinet collection in a lunchbox-sized head.
Look for amps with balanced XLR outputs featuring ground lift switches to eliminate hum, and variable level controls to match your interface’s input requirements. Some designs include dual outputs—one pre-power amp for re-amping, and one post-power amp for direct recording—giving you maximum flexibility in post-production.
Portability vs. Features: The Studio Compact Dilemma
The quest for the ultimate studio amp often pits portability against functionality. Lunchbox-sized heads weighing under 10 pounds offer incredible convenience and can be easily mounted in racks or flown to sessions, but they typically sacrifice tube complement and transformer size—the very components that define low-end authority and dynamic response.
Combo amps integrate speaker and head in one package, eliminating the need to transport separate cabinets and ensuring consistent tone between sessions. However, their fixed speaker limits your sonic palette unless you add extension cabs, partially negating the space savings. The best compromise is often a compact head paired with a lightweight 1×12″ cabinet, giving you modular flexibility without breaking your back.
Consider your typical session scenario. Do you travel to different studios weekly? A head with a DI might be all you need, using studio-provided cabs. Do you work primarily in your own space? A combo with extension speaker options offers maximum versatility. The weight of the power and output transformers is often a good indicator of tone quality—exceptionally light amps sometimes use switching power supplies that lack the sag and compression of traditional iron.
Price Tiers and What You Actually Get
The low-watt tube amp market spans from sub-$300 imports to $3,000+ boutique masterpieces. Understanding what each tier offers helps you invest wisely. Entry-level amps typically use PCB construction, minimal features, and mass-produced transformers. They can deliver credible crunch but often lack the refinement, noise floor performance, and long-term reliability for serious session work.
Mid-range amps ($800-$1,500) represent the sweet spot for most studio players. You’ll find hand-wired or hybrid construction, better component selection, useful features like effects loops and attenuators, and transformers from reputable manufacturers. These amps offer 90% of the boutique experience at half the price, with reliability suitable for regular session work.
Boutique amps ($2,000+) justify their price through premium components, proprietary transformer designs, innovative circuits, and meticulous hand-assembly. They often include unique voicing options, superior attenuation, and recording-specific features. For professional session players or producers building a signature sound, this tier offers tools that simply don’t exist elsewhere. The law of diminishing returns applies, but the last 5% of tone and flexibility can be worth the investment if it defines your sound.
Matching Your Crunch Style to Circuit Topology
Your ideal amp architecture depends entirely on your playing style and the genres you record. British-style cathode-biased designs (like classic EL84 amps) offer natural compression and early breakup, perfect for indie rock, alternative, and classic rock where dynamic response and touch sensitivity are paramount. Their simpler circuits often have fewer gain stages, resulting in more immediate, articulate crunch.
Fixed-bias American designs using 6V6 or 6L6 tubes provide tighter low-end, cleaner headroom, and more defined crunch that suits country, funk, and modern rock where note definition under gain is critical. These amps typically feature more complex preamp sections with cascading gain stages, allowing higher gain levels before power amp saturation.
Cathode-follower tone stacks, found in many boutique designs, offer lower output impedance and more powerful EQ shaping, letting you drastically alter the amp’s character. This flexibility is invaluable in session work where you might need to emulate multiple classic tones from a single amp. Conversely, simple volume-and-tone-knob designs force you to rely on guitar and pedal controls, which can be limiting but often yield more organic, less “processed” crunch tones that sit naturally in vintage-inspired productions.
Common Studio Crunch Mistakes and How to Avoid Them
Even seasoned players stumble when adapting stage rigs for studio work. The most frequent error is choosing an amp based on bedroom tone rather than recorded tone. An amp that sounds dark and muddy in your practice space might record perfectly, while a bright, cutting bedroom amp can turn harsh and fizzy under studio mics. Always evaluate potential purchases through a microphone, not just your ears.
Another pitfall is overloading the front end with excessive pedal gain. While boosting the input can be great for pushing the power section, too much preamp distortion from pedals masks the amp’s natural character. Instead, use pedals to shape the tone and add a touch of compression, letting the amp provide the core distortion character. Your recordings will sound more organic and maintain better dynamics.
Ignoring the room’s role is a cardinal sin. Low-watt amps interact dramatically with their environment. That perfect tone you dialed in your treated studio might turn boomy in a larger live room or thin in a dead iso booth. Develop a baseline setting, then learn to adjust the EQ and mic placement for different spaces rather than rebuilding your tone from scratch each session.
Future-Proofing Your 2026 Studio Rig
The amp landscape evolves rapidly, but certain principles ensure your investment remains relevant. Prioritize analog signal paths over digital processing—the core tube tone won’t become obsolete. Choose amps with standard tube complements (EL84, EL34, 6V6) that will remain available and affordable. Proprietary or rare tubes might sound unique but become liabilities when you need a replacement before a crucial session.
Modular designs that allow easy circuit modifications or tube swaps extend your amp’s versatility. Some manufacturers offer upgrade kits or voiced circuit modules that transform your amp’s character without buying a new unit. This adaptability is invaluable as musical trends shift.
Consider connectivity standards. While current digital features like IR loading are convenient, ensure the amp sounds exceptional as a pure analog device. Technology changes, but great tone is timeless. An amp that sounds magnificent through a microphone will always be relevant, regardless of whatever USB-C or Bluetooth standard emerges next year.
Frequently Asked Questions
What’s the ideal wattage range for studio crunch tones?
For most studio applications, 5-15 watts hits the sweet spot. Five-watt amps break up at conversation levels (80-85dB), perfect for intimate tracking and late-night sessions. Fifteen-watt designs give you enough headroom for cleaner passages while still reaching power tube saturation without punishing volume. Anything below 2 watts can sound boxy and lack low-end authority, while 20+ watts often requires attenuation even in larger studios. The key is matching the wattage to your typical recording SPL—choose an amp that reaches its sweet spot at your room’s comfortable working volume.
Do I need an attenuator if the amp is already low-wattage?
Absolutely. Even a 5-watt amp can hit 95dB through a efficient speaker—loud enough to cause hearing fatigue during long sessions. A quality attenuator lets you fine-tune the recording level independently from the tone, crucial for managing bleed into other mics and maintaining consistent monitoring levels. More importantly, it allows you to push the power section harder than you could tolerate otherwise, accessing deeper saturation and compression. Think of attenuation not as volume reduction, but as tone enhancement that happens to make things quieter.
How do I prevent low-watt amps from sounding thin when recorded?
Thin tones usually stem from insufficient low-end push or poor mic placement. First, ensure your amp isn’t excessively attenuated—power amp saturation contributes significantly to perceived fullness. Use a speaker with adequate low-frequency response; many low-watt combos skimp on cabinet size, killing bass. Mic placement is critical: start with the mic 1-2 inches off the grille, halfway between cone center and edge. This captures both the highs from the dust cap and warmth from the cone’s body. Blend a room mic 3-6 feet back to add depth and air. Finally, don’t fear a touch of low-end EQ boost around 100-150Hz during mixing; analog tape naturally rolled off these frequencies, so digital recordings sometimes need help sounding “full.”
Can I gig with a studio-focused low-watt amp?
Yes, but with caveats. Many low-watt amps include enough volume for small clubs (especially 15-20 watt designs), but you’ll need to mic through the PA for anything larger. The bigger challenge is clean headroom—if your band plays dynamically, you might not have enough volume for truly clean passages before the amp breaks up. However, for genres where crunch is always welcome, a low-watt amp with a good PA feed can be ideal. Some players even prefer them live, as they provide consistent tone without fighting the sound engineer. Just ensure the build quality can withstand transport and that you have a backup plan for clean tones if needed.
What’s the difference between cathode-biased and fixed-bias for studio use?
Cathode-biased amps self-adjust as tubes age and offer natural compression and earlier breakup, making them forgiving and dynamic for studio work. They typically run tubes hotter, which can shorten tube life but yields sweeter harmonic content. Fixed-bias amps require periodic adjustment but provide tighter low-end, more headroom, and more defined crunch that’s easier to control in a mix. For session players who need maximum versatility, fixed-bias designs with adjustable bias controls let you fine-tune the amp’s response. For set-it-and-forget-it recording where touch sensitivity is key, cathode-biased simplicity shines.
How important is the effects loop for studio crunch?
It depends on your workflow. If you run time-based effects (delay, reverb) or modulation (chorus, phaser) after the preamp distortion, a quality loop is essential for maintaining clarity and preventing mud. For players who get all their gain from pedals and use the amp as a clean platform, the loop becomes less critical. However, even if you don’t use effects, a loop can serve as a post-preamp DI for re-amping, giving you flexibility in post-production. Look for loops with send/return level controls and true bypass capability for maximum utility.
Should I choose a combo or separate head and cabinet for studio work?
Separate head and cabinet offers more flexibility—you can swap speakers, isolate the head for less noise, and position the cab optimally for miking without reaching around the amp chassis. Combos are more convenient, take up less space, and ensure you always have a matched speaker. Many modern combos include extension speaker outputs, giving you the best of both worlds. For pure studio use where space isn’t critical, a head with two different 1×12″ cabs (one open-back, one closed-back) provides maximum sonic variety. If you travel to sessions, a quality combo with a DI might be more practical.
How do I maintain consistent tone between different recording sessions?
Document everything: take photos of your settings, note the guitar and pickup used, record the exact mic placement with measurements from the grille and cone, and log the attenuator setting. Use the same power source (amp circuits can sound different at varying line voltages). Keep spare tubes and bias the amp consistently. Some players even mark their preferred settings with small dots of nail polish on the knobs. Most importantly, record a reference tone at the start of each session—30 seconds of standard chords and picking at your main settings. This gives you an A/B comparison if something sounds off later.
Are expensive tubes worth it for studio amps?
For critical recording positions like V1 (first preamp tube) and your power tubes, absolutely. Premium tubes offer lower noise, better matching, and more consistent performance between replacements. A $50 NOS (new old stock) 12AX7 in V1 can dramatically reduce hiss and microphonics compared to a $10 modern production tube. For power tubes, matched pairs/quads ensure balanced output and smoother breakup. However, for later gain stages and phase inverters, standard modern tubes work fine. Think of it as a tiered approach: invest in the best for tone-critical positions, save money on utility positions.
What’s the best way to evaluate a low-watt amp before buying?
Never buy based on YouTube demos alone—the compression and EQ of video platforms hide crucial details. If possible, arrange a studio trial where you can record the amp through your own mics and listen back in your monitoring environment. Bring your main guitar and a few key pedals. Record the same short phrase at multiple settings: clean, edge-of-breakup, medium crunch, and full saturation. Pay attention to noise floor, note bloom, and how the tone changes with picking dynamics. Check how easily it overdrives your recording interface’s preamps—some low-watt amps have surprisingly hot outputs. Finally, play through it for at least an hour. Some amps reveal harshness or fatigue only after extended listening.
See Also
- 10 Low-watt Tube Guitar Amplifiers for Cranked Tone at Bedroom Levels in 2026
- 10 Essential Tube Guitar Amplifiers for Studio Recording in 2026
- 10 Hand-wired Tube Guitar Amplifiers for Boutique Studio Sessions in 2026
- 10 Tube Guitar Amplifiers Under 15 Watts for Studio Recording in 2026
- 10 Affordable Tube Guitar Amplifiers Under $500 That Rival Boutique in 2026